
Which came first, salt-dough Christmas ornaments — or Christmas itself?
Some accounts pin the origins of this simple decorative material to ancient Egypt, where it is said to have evolved alongside the earliest kinds of ceramics. It reportedly made its way to America with German immigrants in the 19th century, and experienced a resurgence in popularity during the 1970s.
Here on the East End, traditional salt-dough ornaments seem especially fitting, as salt-adjacent as we are as a seaside community. They also hold resonance in a community that values the handiwork of artists and artisans. (This time of year, the supporting evidence for our communal love of homemade holiday ornaments and decor is all around us at popular seasonal festivals like the Hayground School’s Homegrown for the Holidays event in Bridgehampton, the By Hand show put on annually at Ashawagh Hall in Springs, and newer events like The Church’s Holiday Makers Market in Sag Harbor.) They’re also just so darn pretty.
As it turns out, salt-dough decorations are not hard to make — and make for a good time among crafty friends or relatives, too. Our afternoons experimenting with recipes and kitchen tools yielded festive feelings, dough under fingernails, and a batch of Instagram-worthy ornaments. Here’s how we did it.
TOOLS
• Rolling pin
• Large bowl
• Baking sheet
• Round cookie cutters of various sizes, with crimped edges or without
• Cookie stamps of various designs
• A straw for poking holes
• Parchment paper
• Wire rack for drying
• Ribbons or twine for hanging finished ornaments
• Shimmery or glossy paints or Mod Podge
• Paintbrush
• Optional: Rolling pin guides
INGREDIENTS
• All-purpose flour
• Fine table salt (don’t be tempted to use rough salt)
• Water
PREPARATION TIME
• At least 10 minutes to mix and knead
• Half an hour to cut out
• 24 hours to air-dry
• Two hours’ baking time in a 250-degree oven
• Additional time as needed for painting or glazing
METHOD
The key to successful salt dough starts with the ratio of ingredients: two parts flour, one part salt, and just under one part water. Combine ingredients in a large bowl (stand-mixer optional here) and mix evenly. Dust that surface with additional sprinkles of flour, then plop the dough down and begin to knead.
Kneading time will vary. Some recipes recommend 7 to 10 minutes, but we found it helpful to go longer, to around 12 minutes. If the dough is overly tacky, add a few more pinches of salt and flour as you knead until you reach a consistency that won’t get stuck in your cookie cutters or molds. Split dough into smaller sections for easier rolling.
Pro tip: Lay the sheets of parchment in the baking sheet and roll the dough out directly onto the parchment! This will prevent the cookies from getting mushed or malformed during transfer, because you don’t have to move them until they’re dry and done. We also found it helpful to use rolling-pin guides for uniformity; a quarter-inch thickness worked best.
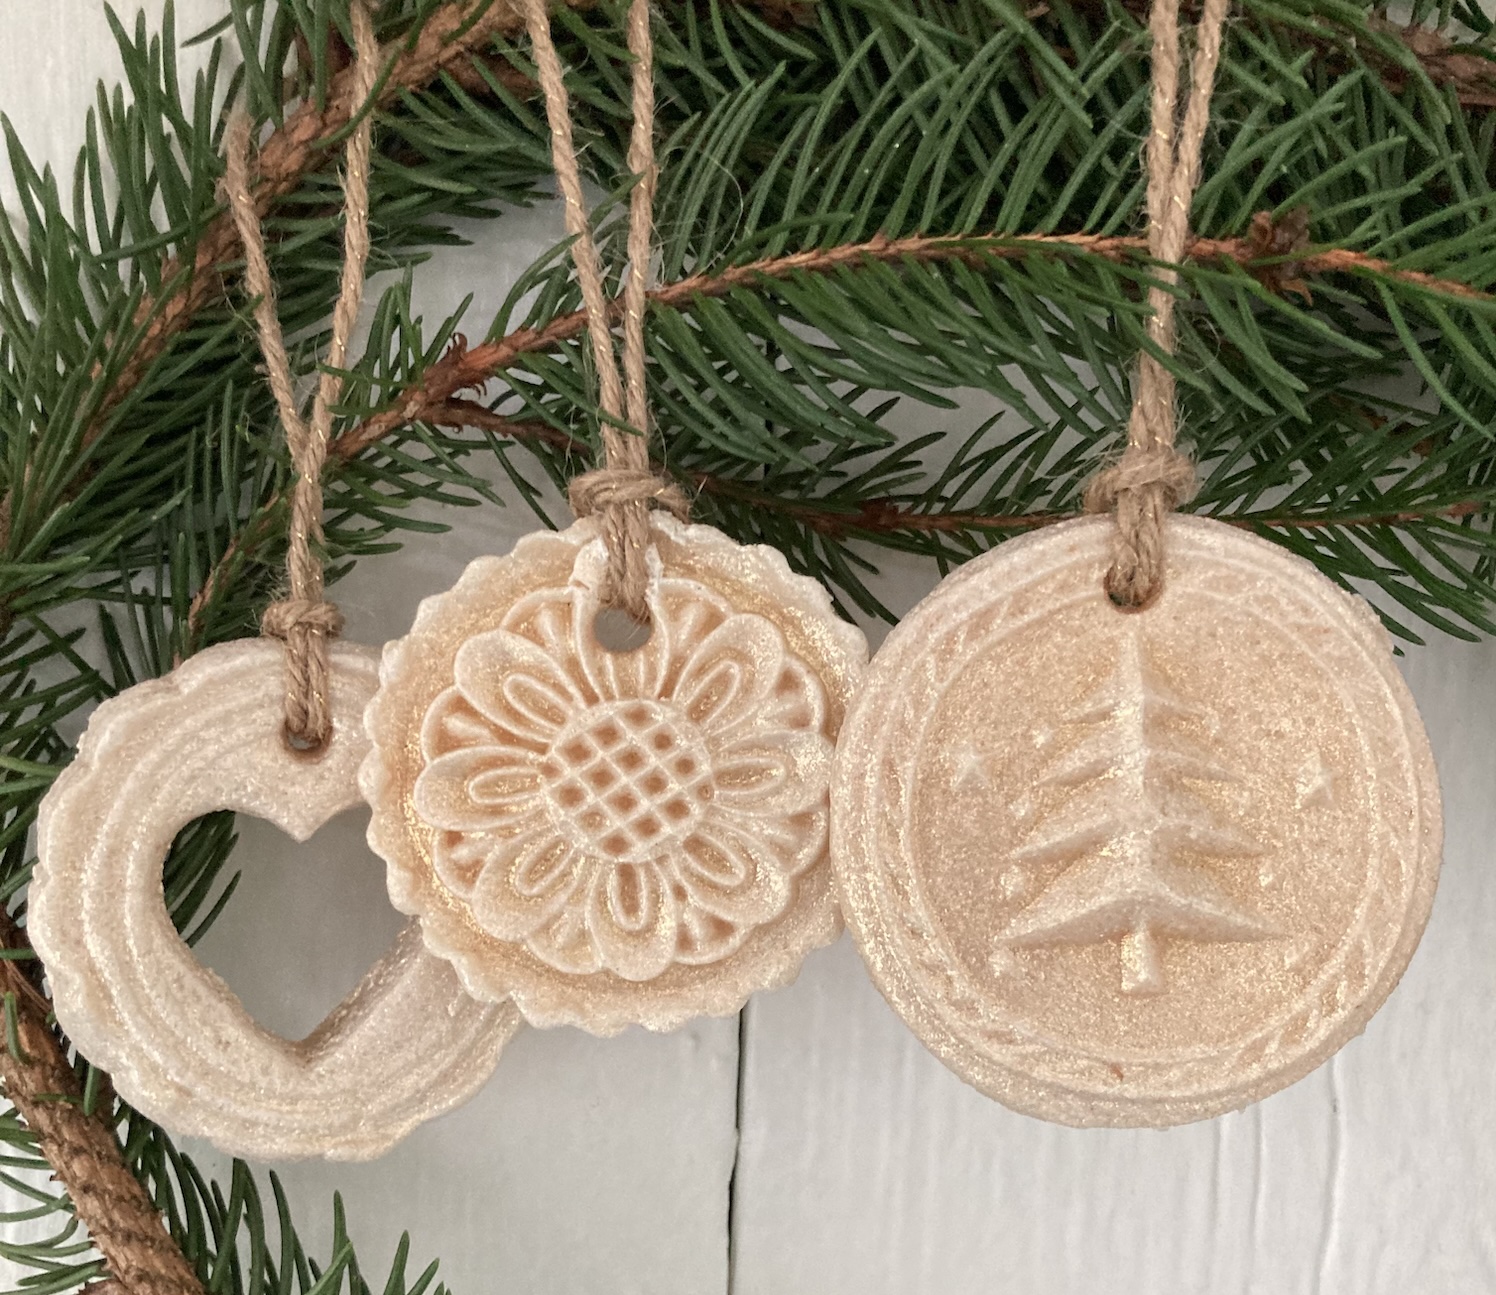
Then, one at a time, press your cookie molds into the rolled-out dough and then select a cutter to cut it out in the shape of the actual ornament. This will likely take some trial and error, but the good news is that any mess-ups can simply be kneaded back together and re-rolled to try again. For the more detailed molds (like those of wood or metal used for springerle cookies), we found it helpful to first use a pinch of flour to dust the surfaces that came into contact with the dough.
Once the ornaments have been cut, use the straw or a similar tool to poke a hole at the top of each one. These small holes should be wide enough for stringing the ribbon or twine that will eventually be used to hang them on a Christmas tree, swag of greenery, or other such holiday décor.
Allow the ornaments to air dry for at least 24 hours right on the tray before baking for two hours in an oven heated to 250 degrees. Note that the longer they stay in the oven, the more they will take on a golden hue; you may even find you prefer that look. Remove from oven and cool completely on a wire rack.
DECORATING
Now comes the super-fun part: decorating your ornaments. Grab a paintbrush and a medium of your choosing. We found the most success with a shimmery product that’s made as an add-in for acrylic paints: an iridescent silver (Liquitex Basics) and a sparkly gold (DecoArt Enchanted topcoat). You can also use straight-up Mod Podge to give it a slightly glossy look.
When your designs are completely dry, string ribbon or twine through the hole. And when you hang them up, know that your hands held more than just salt, flour, and water — they also held up a tradition dating back thousands of years.